If you master the technique and follow all the rules, you can start tinting your car yourself. In reality, there is nothing complicated in such a procedure. You need to prepare materials, take some tools, and allocate time for work.
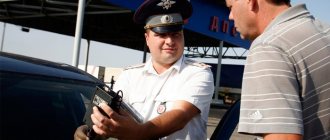
There is a lot of controversy regarding car tinting. It is important to remember that everything is allowed in moderation. If you take a film that is too dark and stick it on the entire surface of the windshield, you shouldn’t be surprised by fines later.
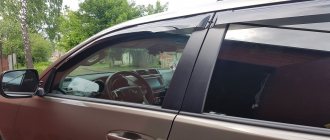
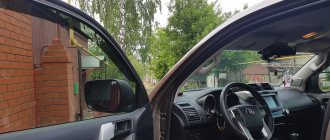
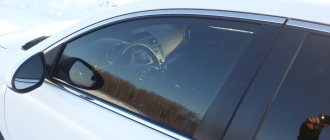
With side windows, everything is somewhat simpler, and such strict restrictions do not apply here. Although it is not recommended to tint with films that are too dark, at least for reasons of your own safety.
Having decided to tint your car, you should understand in more detail the features of doing the work yourself. You need to act carefully and consistently. This way you will definitely achieve a positive result.
Types of tinting
Films for tinting car windows differ in quality, shades and degree of light transmittance.
Darkening materials are divided into several types:
- factory tinted windows;
- glass tinting varnish;
- film with an adhesive layer and a darkening effect;
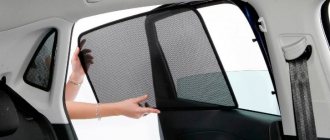
- curtains
You can make windows darker using any of the following methods. Film and varnish produced by different manufacturers differ in quality, so it is better to use well-known materials.
What tint should you use:
- 3M;
- Llumar;
- SunTek;
- SunControl;
- Armolan;
- Global;
- MTF.
When covering glass with cheap tinting, after some time cloudy inclusions, streaks and fading may appear. The choice of color depends on the personal wishes of the driver and the shade of the car body.
How to choose a tinting film
Let's start with how best and what film to darken a car, and how it should be chosen for this procedure. One of the criteria that drivers pay attention to when purchasing a tint film is the percentage of its light transmission. This indicator means how much light flux the tinting will transmit and how much it will block. In other words, this will affect the degree of darkness.
The darkest one has a light transmission percentage of 5. This means that 95% of the light flux will be blocked by such a coating. While the lightest is characterized by 70% throughput according to GOST. This is the standard that is used in many countries where such requirements are caused by security and order considerations. In our country, for now, we have a more tolerant attitude towards this issue, so many craftsmen strive to simply glue the film with their own hands.
I myself drove a tinted car for several years. I darkened everything except the windshield with 15th film. There is no severe discomfort, but when driving through unlit courtyards with constant turns, I had to lower the front windows.
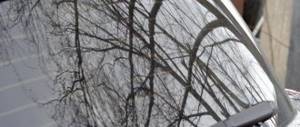
It is not advisable to darken the windshield, as this is directly related to traffic safety. It is better to tint the front side windows with a film with a transmission coefficient of 30% (although this does not correspond to the regulations for the vehicle’s approval for operation), and for the rear windows almost any one will do. One of the most popular is colored film, most often black, dark blue, silver, or mirror. Even a dark coating makes it possible to drive comfortably at night, if it has a normal light transmittance percentage.
Materials and tools
Car window tinting is a simple process that you can do yourself. However, to achieve a good result, you need to be careful and use quality materials.
Film tinting tools:
- industrial dryer;
- lighting equipment or bright lamp;
- sharp stationery knife;
- rubber spatula for smoothing tint on glass;
- a set of soft microfiber cloths;
- soap solution for tinting;
- spray with air pumping for uniform spraying of the composition.
When varnishing, you need to dismantle the part or carefully close the interior trim using rags, newspapers and masking tape. A degreasing mixture used to treat the surface before painting can harm door cards, so they must be protected with a thick cloth.
To install tinted curtains or finished glass at home you will need:
- screwdrivers;
- spanners.
All necessary clips and hooks for curtains are secured in hidden places using the included latches and screws.
When tinting car windows yourself, you should be careful not to let the liquid get into your eyes.
What kind of film is there for a car and how to choose it?
Tinting is not difficult, but you will need a special material - car film. It can be purchased at a store that offers products for cars, but first you need to familiarize yourself with the varieties of this material.
There are three main types of film for front windows:
- Athermal: This material is transparent and therefore cannot be fined for its use. The film perfectly blocks ultraviolet rays, but does not protect from prying eyes.
- Standard Chinese or American film: this type is glued to car windows using a soap solution, and very simply with your own hands. Many of its types have low light transmittance (5, 10, 15%), they are not recommended for use on front windows, since such tinting violates the law, and if stopped by a traffic police officer, you will have to pay a fine.
- Removable tint made of silicone: it is convenient because, if desired, it can be removed from the car at any time, since it is not glued, but is held in place by static. The downside is that it violates established rules, impairs visibility, and if a photo or video shows its use on the front windows of a car, you will have to pay a fine.
When buying film for a car, you should not give preference to cheap materials. They are usually of low quality, and if you glue them yourself, you can get a bad result. Therefore, if you choose a material, it should be from an expensive and well-established company. You can consult with the seller about which film is best suited for the front windows of your car. Most often, a specialist gives correct and useful recommendations.
Since you will have to carry out the procedure yourself, you need to take care of preparing for tinting. To do this, you will need special tools, which can also be purchased at the store or found at home. Among them: a knife, a ruler, napkins, sponges and a spray bottle. As a solution, you can use soap or shampoo mixed with warm water.
Car preparation
To perform high-quality car window tinting, you need to prepare the materials and the car in advance. A properly cleaned window will provide good visibility at any time of the day and will not become stained when pasted.
High-quality tinting is covered with a protective layer that can withstand small mechanical loads. However, a grain of sand that gets on the glass can break through the film when smoothing it with a scraper during the pasting process.
Preparing for tinting at home:
- Wash the car body thoroughly with a high pressure washer.
- Apply a soap solution to the inside of the windows and use a blade to go over the entire surface to cut off any adhered grains of sand and dirt deposits.
- Remove the decorative trim from the posts.
- Thoroughly rinse the corners and hidden cavities of the front and rear shields.
- Degrease the prepared surface.
The heated rear window should not be treated with a blade or cleaned with a hard sponge. If dirt is found, it should be washed off with window cleaning chemicals until it disappears completely.
After cleaning the windows, you need to make a pattern from the film or cover the interior panels for painting with varnish.
All work is carried out in a room with a positive air temperature. Before tinting, you can wet the floor with a spray bottle to prevent dust from being raised when walking.
Pattern for rear window
The glass must be completely dry before applying. Next, with a damp cloth or sponge, you need to apply 2 vertical lines closer to the edges and 1 horizontal line in the center. Now you need to apply the tint film on the glass with the transparent material facing out. When cutting, you need to leave a margin of a couple of millimeters.
Now you need to remove the remains. It is most convenient to do this together, so you need an assistant. He should smooth the film so that all horizontal folds disappear. You can use a squeegee for this. It is best to remove vertical folds with a hairdryer, but this must be done very carefully, as there is a risk of overheating or burning. After this, you need to use a squeegee to smooth the film so that it takes the shape of glass. This must be done from the center to the edges, in all directions. Actions must be careful so that creases and folds do not appear again, since it will be almost impossible to remove them later.
Now you need to use a flashlight or other device to check whether the film has been removed everywhere. To do this, place the flashlight in the cabin and remove from the outside all residues that extend beyond the seal, leaving literally 1-2 mm in reserve.
How to darken a rear window
The tinting of the rear windows is no different from the windshields. To give a unique shape, a template is made and glued to a pre-treated surface.
Shields with heating threads should be passed with a scraper in a horizontal plane. This will protect the chain from damage and ensure a better fit of the tint. When carrying out work, you need to disconnect the plug going to the thread, and also remove the additional brake light.
Film template
Tinting the rear window begins with preparing a template. To do this you need:
- Cut material to fit.
- Apply to damp glass and smooth with a scraper.
- The corners are heated with a hairdryer and take the exact shape.
When making a template, it is important to lay the material with the adhesive layer facing up, otherwise, when gluing it to the inner surface, the corners will be bent in the other direction.
How to apply tint
Tinting the rear window is done using a squeegee, soap and water, or window cleaner. To protect the shelf from getting wet, you can cover it with a cloth.
Gluing tint to the rear window:
- Degrease the inside and wipe with a clean cloth.
- Inspect the surface for the presence of villi, hairs, and grains of sand.
- Treat the window with liquid.
- Tear off the transparent layer and apply the material to the glass.
- Wet the surface generously.
- Move the material in the desired direction, clearly matching the boundaries.
- Carefully remove the water using a rubber scraper.
Pasting is carried out without a hairdryer, since the template follows all the curves of the shield. After drying, you can install the brake light and return the plastic panels to their place.
Possible problems and their solutions
When tinting a car, various problems may arise. To avoid this, you must strictly follow the technology of the procedure.
Air bubbles
It is worth dealing with this problem at the initial stage. This is done before the film dries. After finishing work, it is recommended to carefully inspect the windows. If there are bubbles, they are removed by distillation.
If the film has already dried, it will have to be softened. It is recommended to do this with a hairdryer or clothes steamer. It is permissible to use an iron with a steam generator.
Creases
It is important to avoid this problem at any stage. After the creases, noticeable stripes appear. Usually such shortcomings are typical for Chinese films. Inexperienced craftsmen can easily ruin such material.
Stripes
The stripes appear due to creases. If glued incorrectly, the material can be saved within a few hours. To do this, it is recommended to cut off the excess and compensate for the deficiency by moving the film. This can be done if there is some stock left on the reverse side. To do this, you need to warm it up and remove the tint. Then spray the solution and stick it properly.
Points
Sometimes after tinting all kinds of dots appear on the glass. It is recommended to remove them immediately after gluing the glass. If the film has already set, it is recommended to warm it up.
How to remove tint
Tinted windows become scratched and scuffed over time. In this case, you will need to remove the old film and apply a new one.
To delete, you can use the following methods:
- heat;
- soapy water;
- special chemical compounds.
Heat removal uses a hair dryer to melt the adhesive. When the film is removed, the glass remains clean and does not require additional processing.
When the adhesive layer is softened with soap, streaks and cloudy marks remain, which can be easily removed with a degreaser and a razor. When working with caustic agents, cover the panels with cloth or newspapers.
When cleaning the rear shield from glue, be careful not to damage the heating filaments. If the fiber breaks, it will require restoration by service or using conductive glue.
Athermal tint films
This coating is different in that the glass remains completely transparent, but the protective layer on it is very powerful. There are a lot of practical benefits from gluing such a film. Athermal tinting blocks ultraviolet radiation and protects interior parts from fading and overheating. It does not affect visibility in any way. There are also no problems with DPS. At the same time, the coating is dense and multi-layered. The film can protect glass from various mechanical damages.
If the looks of strangers into the car interior do not frighten you, then this is a good choice for any car.
Adviсe
Tinting without removing the windows does not take much time. To achieve a good result and tint the car without flaws, you need to carefully inspect the shield for dirt and foreign objects.
Windshield tinting is the most difficult step due to the curves and large area. Difficulties are often caused by cutting space for mirrors and rain sensors. For convenience, you should guide the knife along the black line of the silk-screen printing and do not step beyond it.
When selecting material to match the body color, you should avoid bright red shades, which change the correct perception of colors and can confuse the driver while driving.
If certain specifications of the adhesive are observed and high-quality materials are used, the car windows will noticeably transform and retain light transmittance. When caring for tinting, do not use aggressive products or rags with hard bristles: this can lead to clouding and scratches.
What it is?
Tinting is considered the most famous and affordable way to decorate a car. This is an integral element of styling. Look how impressive the car looks in chameleon tint.
The quality of materials and variety of film choices is far ahead of what has been on the market in the last decade. Even inexpensive coatings made in the Middle Kingdom, glued in one layer, will last about 2 seasons if there is no external damage. Multilayer tint film, sold in rolls, is now considered to be of particularly high quality. The choice of suitable film depends on the budget and capabilities of the car owner. In this case, you will have to tinker with the tinting of the side windows, and the work itself requires care. But the result will definitely please the owner.
Film application
How to glue tint. The surface of the side glass is wetted and the lower part of the glass is cleaned with a scraper. Next, the glass is lowered, wetted and cleaned. Then the entire surface is washed with a hard sponge and wiped with distillation. Each edge should be wiped dry with napkins.
Before gluing the tint, the glass is generously moistened with soapy water. Then two-thirds of the protective liner layer is removed from the film blank. The adhesive surface is also wetted with a soap solution. This operation will most conveniently be performed on the rear window of the car. It is better to immediately cut off the excess liner before gluing.
It is important to wash your hands thoroughly. Then the workpiece is carefully placed on the glass, leveled, and a soap solution is squeezed out from under it. That's it, the installation of the film can be considered complete. But it’s important to remember that it hasn’t completely stuck yet. Therefore, it is recommended not to lower the windows for at least a day after gluing the film.
Pattern of film for tinting car side windows
Before you start tinting your car windows, you need to cut out the tint film.
To do this, you need to determine where the adhesive layer is located - it is protected by a transparent liner. Always cut the film along the roll and make sure that the cut piece is a few centimeters larger than the glass.
- Moisten the outside of the glass and place a pre-cut piece of tint material on it with the liner facing toward you. The bottom of the film should be parallel to the outer horizontal window seal and overlap it by approximately one centimeter.
- Using a punch and a knife, make side vertical slits in the film so that you can then place the pattern over the vertical seal by about one centimeter.
- Next, having folded the bottom part of the pattern, lower the glass a little and, having secured the film along the upper edge of the glass, make a horizontal cut in it, and then give it its final shape.
The blank for tinting fixed glass is cut out so that it is several millimeters larger than the transparent area of the glass.
- Pre-fix the film on the outside of the wet glass surface.
- Cut out the workpiece carefully and slowly.
- If the transparent area is limited by the seal, then cut along the seal using a forcing.
Be careful not to damage the car's exterior parts with a knife!
- For ease of work, try to remove excess pieces of the pattern immediately after the cut.
- If the transparent area is limited by an opaque strip of paint, then the cut should be made so that it extends a few millimeters into the opaque part.
Be sure to ensure that the knife blade is always sharp (break off dull parts of the blade in a timely manner).